CI/CD pipeline on a Raspberry Pi – Part 2
Table of Contents
After we mainly took care of the setup and configuration in part 1, I would like to describe the installation of a build server on the Raspberry Pi in part 2 of the experiment. I chose Jenkins because Jenkins is open source and free, and the installation is relatively easy.
The installation of Jenkins
Please connect your Raspberry Pi via SSH and update the basic packages at the beginning. Simply enter the following commands into the console:
sudo apt-get update
sudo apt-get upgrade
Confirm the respective requests with Enter.
Install Java
Next, you need a Java installation, because Jenkins is based on it. I recommend you install OpenJDK – also due to current licensing problems with Oracle:
sudo apt install default-jdkTo test it, simply call up the appropriate version:
java –versionIf you encounter a problem with the error message “Error: missing `server’ JVM at `/usr/lib/jvm/java-8-openjdk-armhf/jre/lib/arm/server/libjvm.so’.”, the following thread has helped me: https://forums.raspberrypi.com/viewtopic.php?t=197824
I executed the following commands, then it ran:
sudo mv /usr/lib/jvm/java-8-openjdk-armhf/jre/lib/arm/client /usr/lib/jvm/java-8-openjdk-armhf/jre/lib/arm/server
sudo apt-get purge openjdk-8-jre-headless
sudo apt-get install openjdk-8-jre-headless
sudo apt-get install openjdk-8-jre
sudo apt-get install default-jre
sudo apt-get install default-jdk
Now the call of “java -version” should provide a successful version information and you can install Jenkins. To do this, provide another package source of Jenkins and install the server via the package manager:
wget -q -O - https://jenkins-ci.org/debian/jenkins-ci.org.key | sudo apt-key add -
sudo sh -c 'echo deb http://pkg.jenkins-ci.org/debian binary/ > /etc/apt/sources.list.d/jenkins.list'
sudo apt-get update
sudo apt-get install jenkins –y
Now Jenkins should be installed and running. Please check this:
systemctl status jenkins.serviceThis command will output the status of the Jenkins service; the following should be in that order:
● jenkins.service - LSB: Start Jenkins at boot time
   Loaded: loaded (/etc/init.d/jenkins; generated; vendor preset: enabled)
   Active: active (exited) since Wed 2017-12-27 22:14:45 +08; 4min 40s ago
     Docs: man:systemd-sysv-generator(8)

Dec 27 22:14:43 raspberrypi systemd[1]: Starting LSB: Start Jenkins at boot time...
Dec 27 22:14:43 raspberrypi jenkins[1670]: Correct java version found
Dec 27 22:14:43 raspberrypi su[1700]: Successful su for jenkins by root
Dec 27 22:14:43 raspberrypi su[1700]: + ??? root:jenkins
Dec 27 22:14:43 raspberrypi su[1700]: pam_unix(su:session): session opened for user jenkins by (uid=0)
Dec 27 22:14:45 raspberrypi jenkins[1670]: Starting Jenkins Automation Server: jenkins.
Dec 27 22:14:45 raspberrypi systemd[1]: Started LSB: Start Jenkins at boot time.
If this is the case, you can already open the Jenkins web interface from your computer via a browser: http://[ip-adresse-des-pi]:8080. If necessary, you may need a few seconds of patience until everything is loaded initially.
Getting Jenkins started
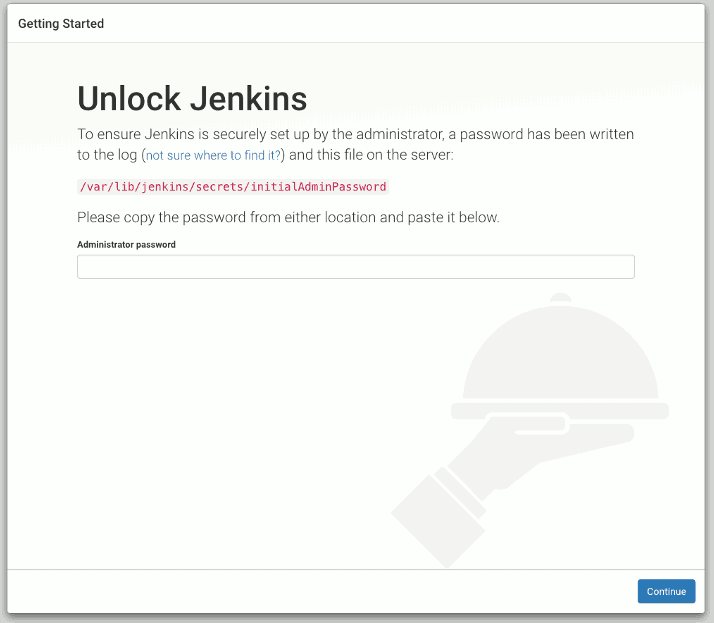
Next, you may unlock the Jenkins instance. To do this, select a special key and insert it in the input field accordingly:

You can get the contents of the file directly from the Raspberry Pi via SSH:
sudo cat /var/lib/jenkins/secrets/initialAdminPasswordSimply copy the issued key from the terminal into the input field and click on “Continue”.
The installation of the plugins
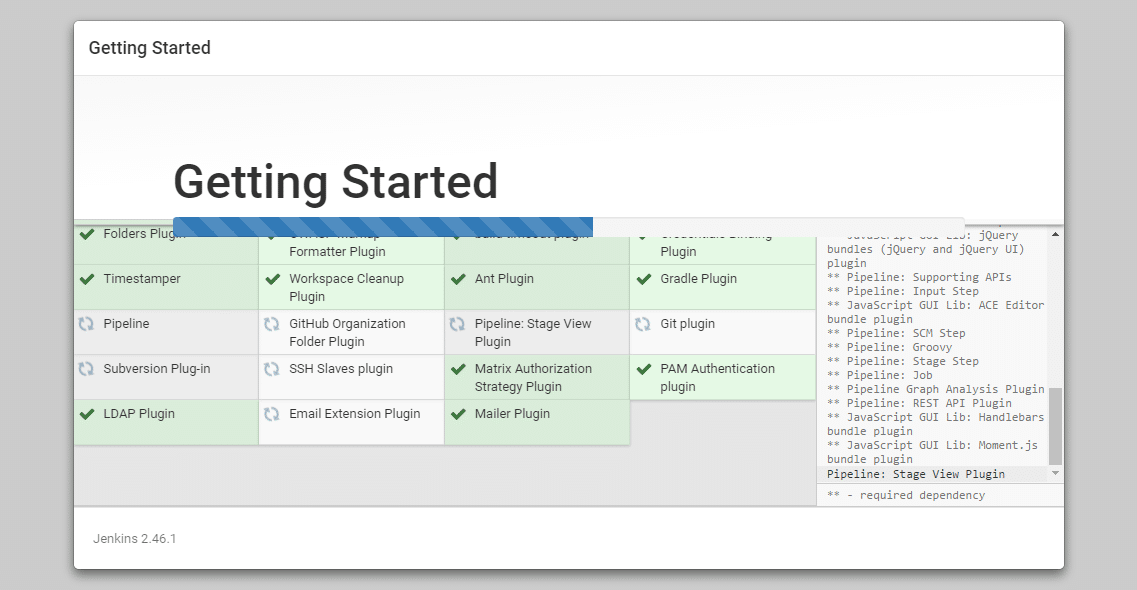
In the following screen please choose “install suggested plugins”. Jenkins will automatically install all plugins one after the other. This may take a few minutes.

Note: During my installation the installation of some plugins was highlighted as faulty. In Jenkins itself I couldn’t identify any problems, so don’t be confused: missing plugins can be installed later.
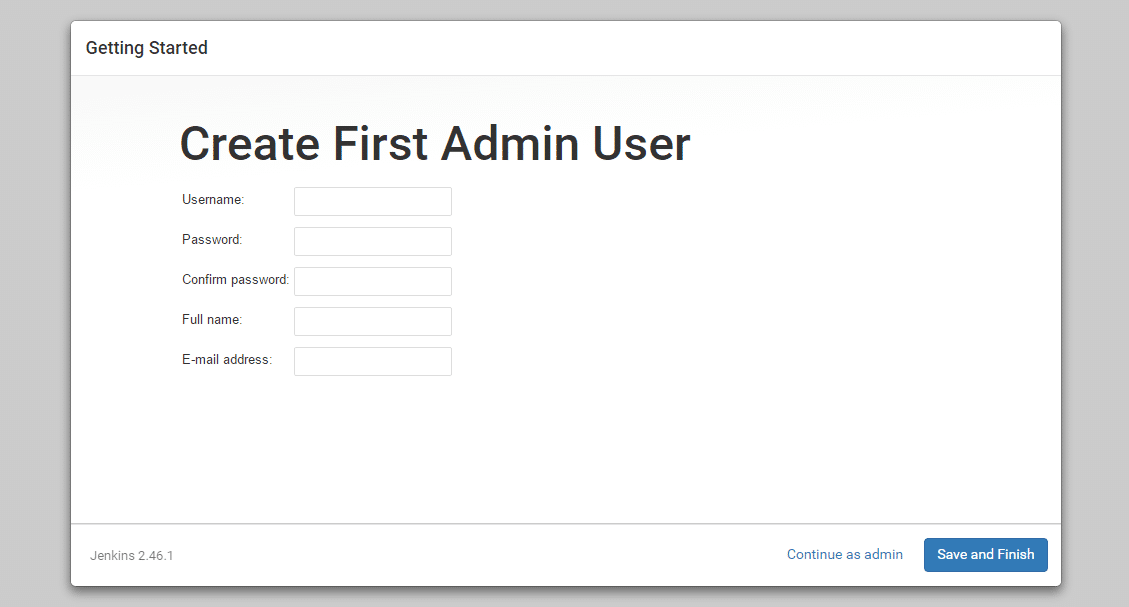
The initial user
Now enter the data for the initial user:

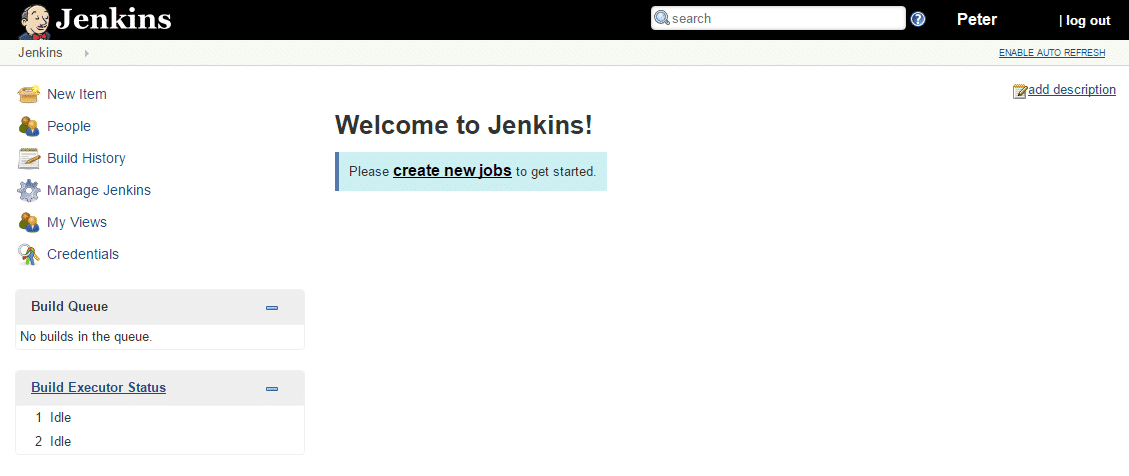
Now you should already see the main page of Jenkins, which is now completely set up:

And you’re done.
Part 3 of the experiment describes how to use the build server and create a build job. Will you be back as a part of it?
Notes:
Here you can find the other parts of Peter Friedland’s series:

Peter Friedland
Software Consultant at t2informatik GmbH
Peter Friedland works at t2informatik GmbH as a software consultant. In various customer projects he develops innovative solutions in close cooperation with partners and local contact persons. And in his private life, the young father plays the cello in the Wildau Music School orchestra.
In the t2informatik Blog, we publish articles for people in organisations. For these people, we develop and modernise software. Pragmatic. ✔️ Personal. ✔️ Professional. ✔️ Click here to find out more.


