CI/CD pipeline on a Raspberry Pi – Part 3
After we put the Raspberry Pi into operation in parts 1 and 2 of the experiment and installed a Jenkins server, we now come to the actual CI/CD pipeline in part 3. Our goal is to automatically provide the software to be developed on a target infrastructure.
The example application
In my example I use a simple web application. It consists of a frontend implemented in Angular and a backend implemented in .NET Core. Since I want to focus on the CI/CD pipeline, the features of the application are very simple: The frontend loads a list of strings from the server via a REST call and displays them in a list.
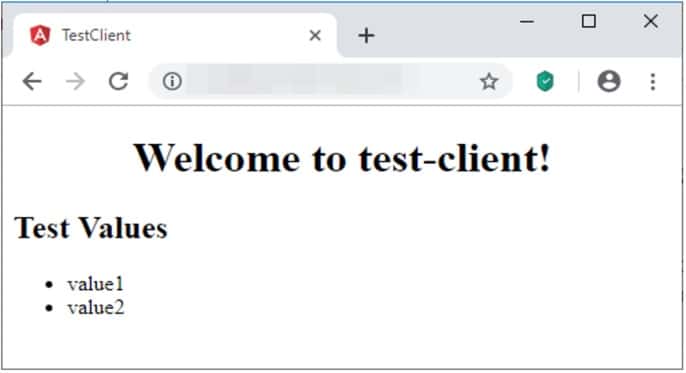
https://github.com/PFriedland89/ci-cd-test-application
Project Structure
First we should take a look at the git-repository, because this is where our build is based. I’ll briefly explain the folder structure, its contents and functions:
• src
◦ client
◦ server
▪ test-server.tests
▪ test-server
Everything is bundled in the “src” folder. Inside the folder there is a folder for the client code (“client”) and the server code (“server”).
In the folder “client” there is a typical Angular application as it is generated by the Angular CLI after generating an application. For the sake of simplicity, all functionality is implemented in the App.Component and a corresponding App.Service. At this point I have only made the tests executable – this is completely sufficient for our test purposes.
In the folder “server” there are two subfolders. In the folder “test-server” there is a .NET Core webAPI project with a controller, which can be accessed via a GET on “http://localhost:5000/api/values” and provides an array of strings.
In the folder “test-server.tests” unit tests based on Xunit and FluentAssertions are implemented, which test the output of the controller.
Structure of the CI/CD Pipeline
At this point I would like to emphasize that there are various ways to technically implement a CI/CD pipeline. I chose a simple solution to evaluate the feasibility of the experiment.
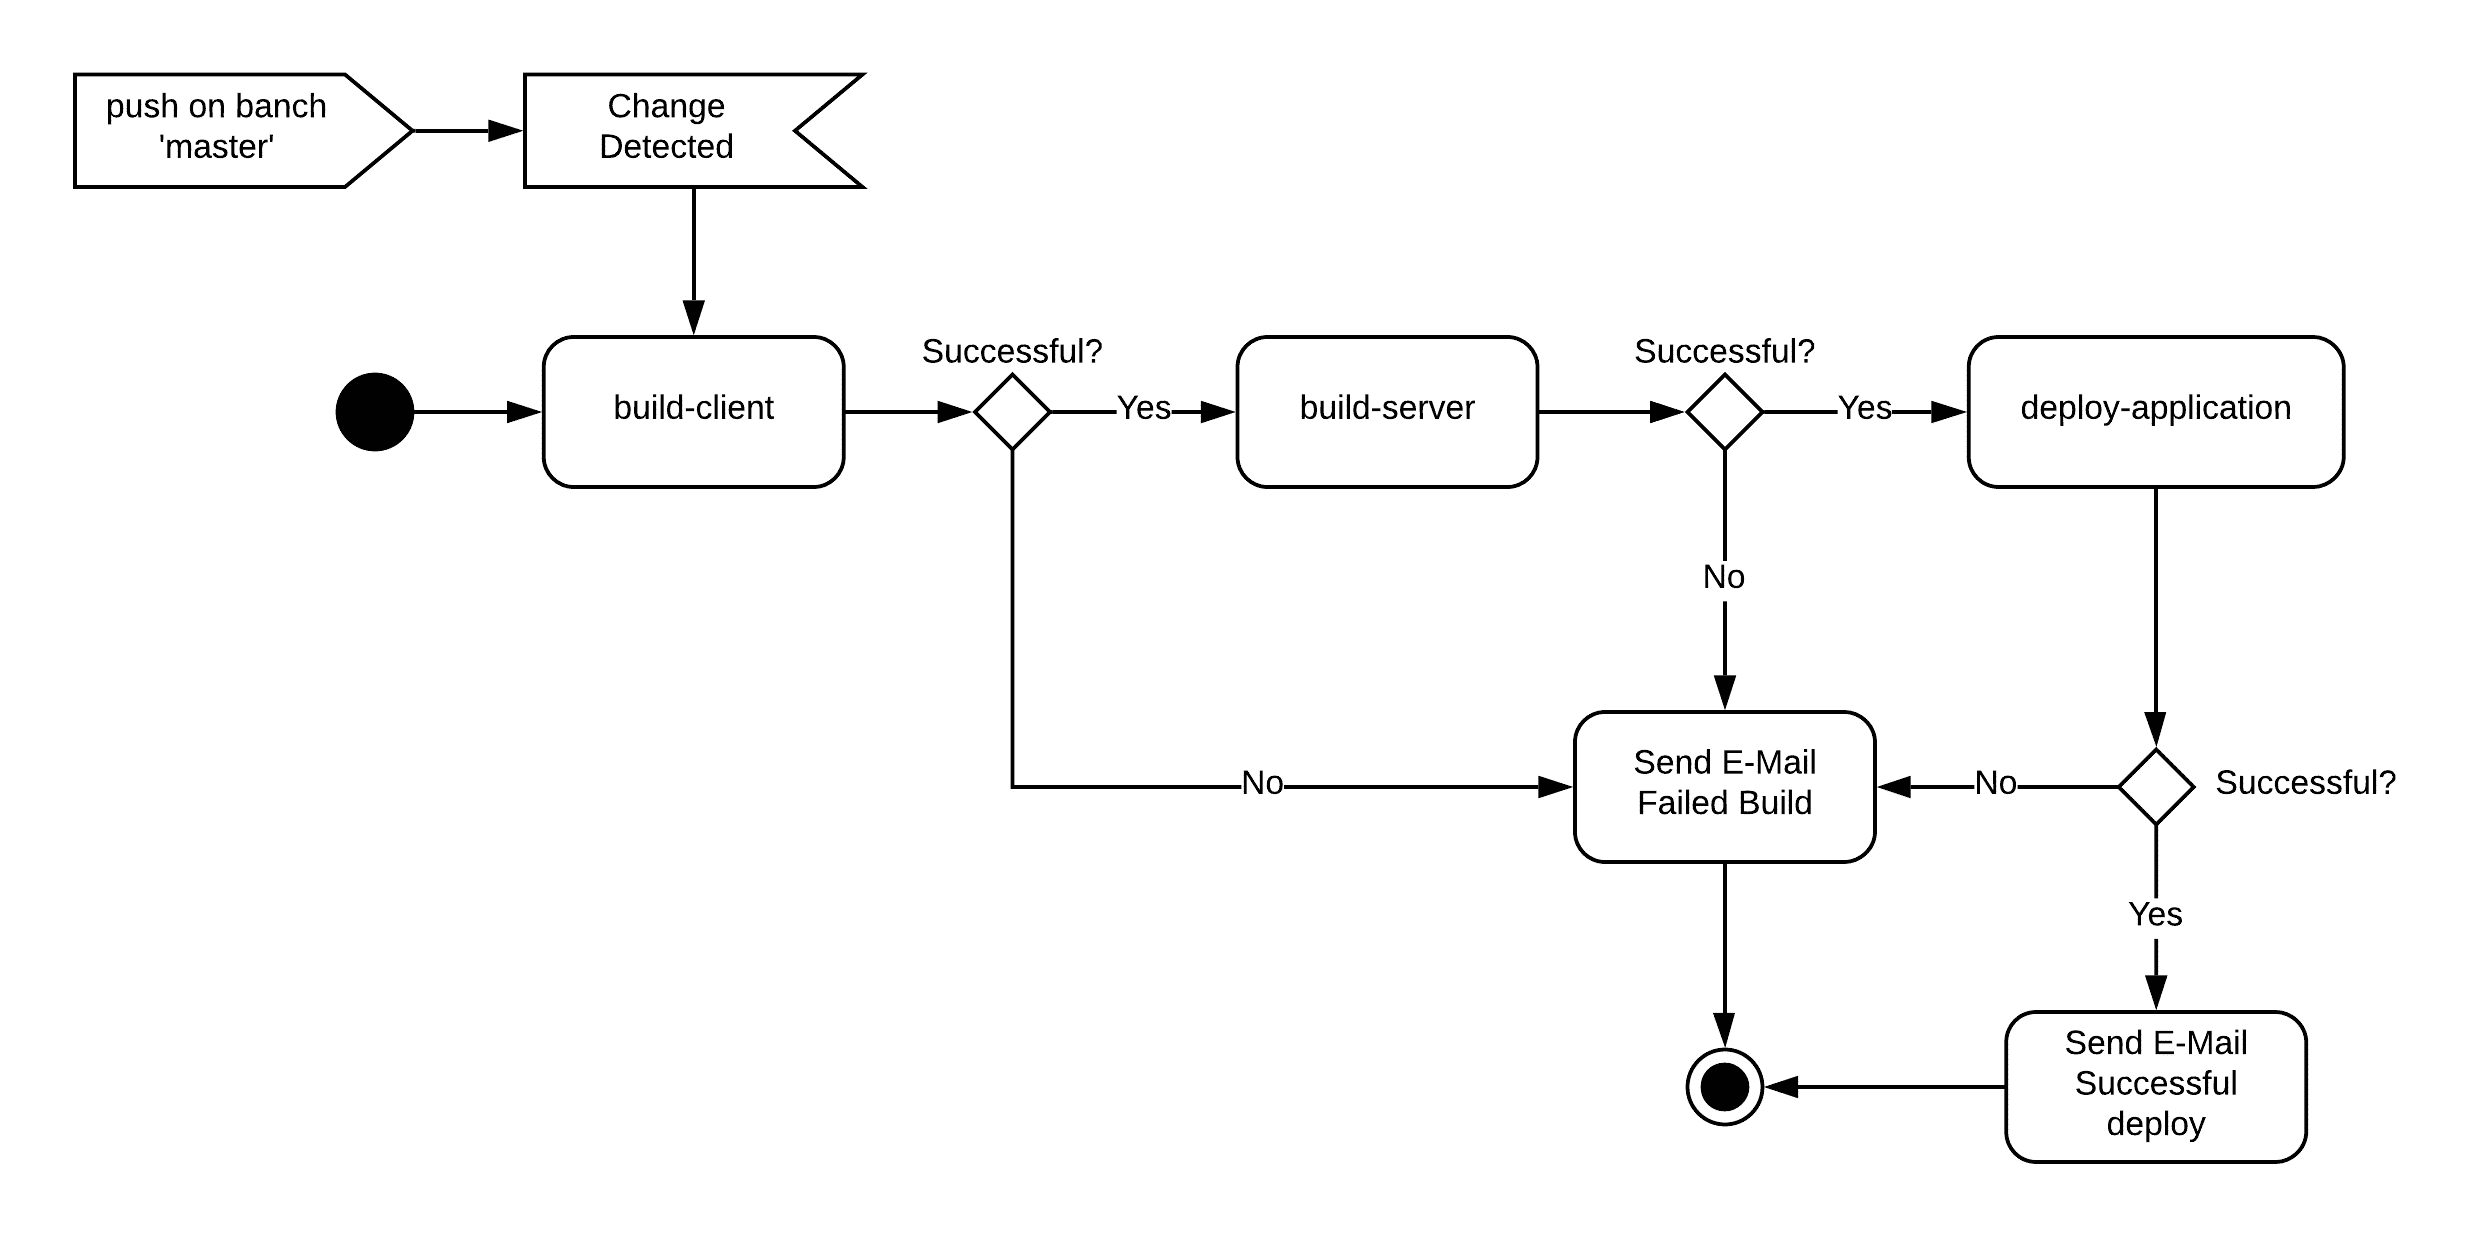
Jenkins organizes its builds in projects. Each project has a name, start triggers, build steps, and post build actions. In our experiment, a project is a self-contained step in the CI/CD pipeline. You can see the different flow paths of the CI/CD pipeline in the following graphic:
The build process will consist of three projects:
– build client
– build server
– deployment application
These three projects are interlinked. The execution of a project creates a build. If a build of a project is successful, the next project in the chain starts a build. If a build is not successful, e.g. because the code is not compilable or tests are not successful, an e-mail should be sent. If the build of the project “deploy-application” is also successfully completed, a success mail is sent with the message that the application was successfully built and deployed.
Since we are talking about a CI/CD pipeline here, the triggering of the builds and, if necessary, the deployment should run automatically. For this, a start trigger is usually set on the first build job of the chain. Since we are using Git in our example, a branch name is required to start the build process. This still allows you to decide when to trigger the chain.
Preparation of the Jenkins server
Before we can create projects and trigger builds, we need to do some installation work first. So far I haven’t provided any tooling on the Raspberry Pi to build and test an Angular application or .NET core. Please connect to your Raspberry Pi via SSH.
Frontend Build Tools
For the build of Angular we need Node.js as JavaScript runtime environment and npm as package manager for Node.js. These can be easily installed with the package manager:
curl -sL https://deb.nodesource.com/setup_8.x | sudo -E bash -
sudo apt-get install -y nodejs
Please check if Node.js has been installed correctly by displaying the version:
node -vInstall npm next and test availability:
sudo apt-get install npm
npm -v
Backend Build Tools
For the backend you need the .Net Core SDK. Fortunately there are official builds for ARM architectures since version 2.2. There is one small thing to install first:
sudo apt-get install curl libunwind8 gettextNext, download and install the Net Core SDK:
curl -sSL -o dotnet.tar.gz  https://dotnetcli.blob.core.windows.net/dotnet/Runtime/release/2.1/dotnet-runtime-latest-linux-x64.tar.gz
sudo mkdir -p /opt/dotnet && sudo tar zxf dotnet.tar.gz -C /opt/dotnet
Now quickly create a link so that you can comfortably use the command line from anywhere:
sudo ln -s /opt/dotnet/dotnet /usr/local/bin And of course you should test the correctness of the .NET Core installation:
dotnet --help Now that your preparations are complete, you can use the Jenkins interface to start creating and configuring projects.
Project build-client
The build of the client should include the following steps:
- Get current source code status from the master
- Create Angular Project
- Publish angular application as artifact
Please register with Jenkins first and create a new project of type “Free Style” from the main page by clicking on “Create element”.
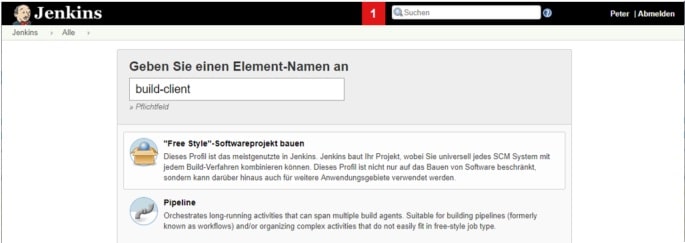
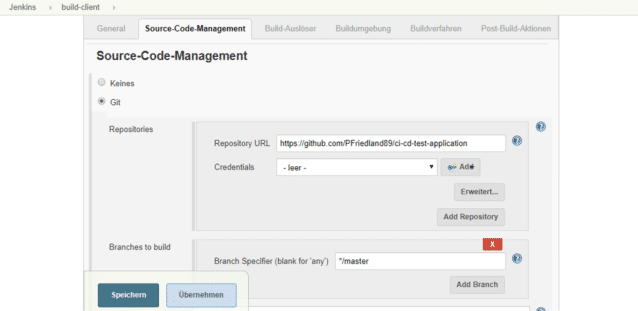
Now you will be redirected to the configuration page of the project. Now work through all steps from our plan and start with the checkout of the source code. Go to “Source Code Management” and enter the data of the Github project:
Then go to the Build Trigger group. Select the checkbox “Query Source Code Management System” and enter “* * * * *” without quotation marks for schedule. Jenkins will then check every minute whether the branch master has changed in order to start the build.
Next, configure the specific build steps by clicking on the “Build Procedure” tab. From the “Add Build Step” drop-down select “Run Shell”. This will give you a small text window in which you can execute shell commands. Here you have to enter all commands to build the client, run the tests and wrap the built client. Enter the following text in the script field:
# install packages
cd src/client
/usr/local/bin/npm install
# build client and package
ng build –prod
rm -f client.tgz
cd dist/ && tar cvfz ../client.tgz ./* && cd -
cd ../../
Change to the directory of the Angular project and install all npm packages from there using “npm install”.
Then create the client using Angular CLI in Prod mode. Finally, pack the result from the dist-folder into a compressed folder and store it in the directory src/client.
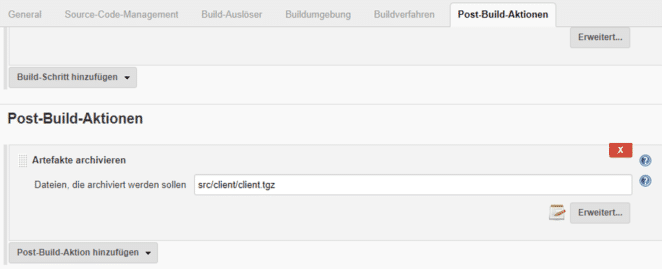
The result of a build usually contains build artifacts. These are stored in a separate directory by Jenkins and can be downloaded or further processed from successful builds. It makes sense to save the built client as a build artifact. Use “Archive Artifact”, which you get under “Post Build Actions” by clicking on “Post Build Action”, and assign “src/client/client.tgz as placeholder:
Your first build job is done and ready for testing. Save the configuration page and trigger a build (see red rectangle):
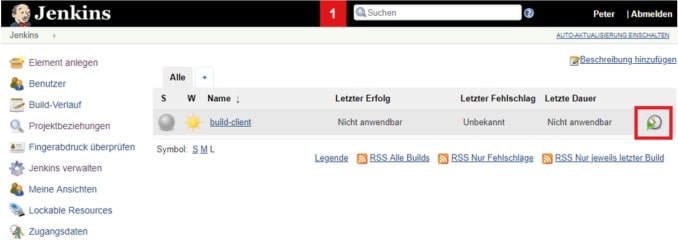
At the bottom left you can see the currently running build:

If you click on the progress bar below the text “build-client”, you will land directly in the log file. There you can observe the progress of the build.
At this point I noticed something quite interesting during the first run: npm tries to resolve a SASS dependency for the ARM platform, for which there are apparently no packages – too bad! However, npm doesn’t abort then, but downloads the sources on its own and translates everything itself with g++ for ARM. I have to say at this point that I think it’s pretty weird.
The only drawback is that the whole thing lasts forever. For me the compilation took about 10-15 minutes. Fortunately this is only to do once, after that the npm modules are cached and the recovery takes about 40 seconds with my Pi. This is acceptable for me.
If the build was successful, you will see the build artifact “client.tgz”:
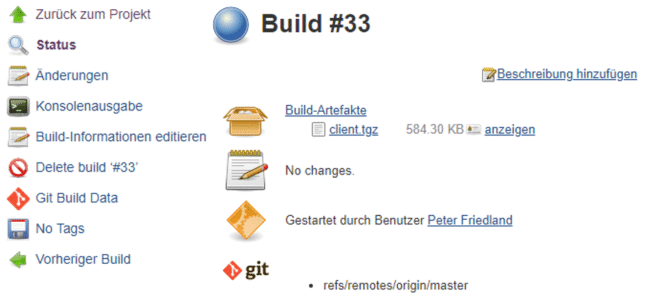
You have now successfully configured your first build job on the Raspberry Pi.
In the 4 and last part of the experiment I describe the creation of the build server project, the deployment of the application and the testing of the pipeline. Will you be involved again?
Notes:
Here you can find the other parts of Peter Friedland’s series:

Peter Friedland
Software Consultant at t2informatik GmbH
Peter Friedland works at t2informatik GmbH as a software consultant. In various customer projects he develops innovative solutions in close cooperation with partners and local contact persons. And from time to time he also blogs.
